Are you new to podcasting and don't know where to start with recording your first episode?
Don't worry, you're not alone. Complex recording software can sometimes be confusing or even intimidating to someone new to podcasting.
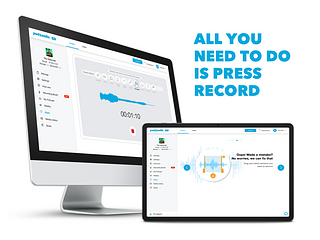
If you find yourself overwhelmed with recording software, we've got a solution for you - Recording Booth! It's easy-to-use, available directly on Podomatic, and will get your first episode recorded and published in just minutes.
Here's how to use it:
LET'S START WITH TESTING YOUR COMPUTER MIC AND VOICE LEVELS
Before we record your first episode, let's do a quick mic check. You can start the check by clicking on the blue button labeled "Start Test". Next, the recorder will automatically start listening to your surrounding environment to make sure that your voice can really shine through.
The test will take about 5 seconds. If your recording environment is too loud, you'll be prompted to try the test again. Before clicking on the "Try Again" button, make sure that your recording environment is as quiet as possible - you can do this by shutting outside noise or by moving into another room.
If the sound level of your recording element is good, you'll be prompted with a blue "Test Voice" button.
After clicking on "Test Voice", speak comfortably from where you are towards your computer. Say something like "Hello everyone, and welcome to my new podcast".
If your voice level is too soft, then you'll want to either move the computer closer, or speak a little bit louder. Click on the "Try Again button" to retest your voice levels.
If your voice levels are too loud, you'll see the frequency wave turn orange, or even yellow, which means you'll want to tone it down a little. Remember, being in the blue frequency range is where you'll want to be and will make sure your podcast sounds good.
Once your voice levels are good, you're ready to start your first recording!! RECORD YOUR VERY FIRST EPISODE
Your voice and sound environments are all tuned up, so now we get to the fun part. Click on the red button with the microphone to begin.
You'll see a 3 second countdown clock, so get ready. After the 3 seconds are up, your recording will start, so tell the world what's on your mind!
Once you're finished with your recording, or need to take a pause, click on the white button with the red square on it.
You can then choose to resume your recording or choose to finish your recording.
EDITING YOUR EPISODE
Before editing, listen to your recording in full and see if there are any areas you don't like, or want removed (it might help to take notes on the exact time stamp(s) that you may be unsatisfied with).
To remove a section, click on the blue wavelength graph at the starting point you want to remove. Then, click on the red triangle and drag it to where you'd like to complete the removal.
Once you have a range selected, click on the orange scissors button to cut that section out . You can also click on the "x" button to cancel the action if you change your mind on removing that section.
Feel free to click on sliding bar next to the blue magnifying glass on the top right section to zoom in and out of your recording's layout. This makes it easier to focus in on areas you want to remove with accuracy.
When you're satisfied with your editing, click on the blue "save button" and give yourself a pat on the back, you're a podcaster now! UPLOAD OR PUBLISH YOUR RECORDING
Now you'll want to make the decision of whether you want to save your recording to your Media Library and publish at a later date, or whether you want to publish the recording straight away. And that’s all there is to it! If you saved the file to your Media Library, you can go there at any time to publish, download, or delete the recording.